Free Video Invitations with Free RSVP: A Complete Guide
Create a free video invitation and collect RSVPs in one place. See the guest reply flow, host dashboard, and optional premium design choices.
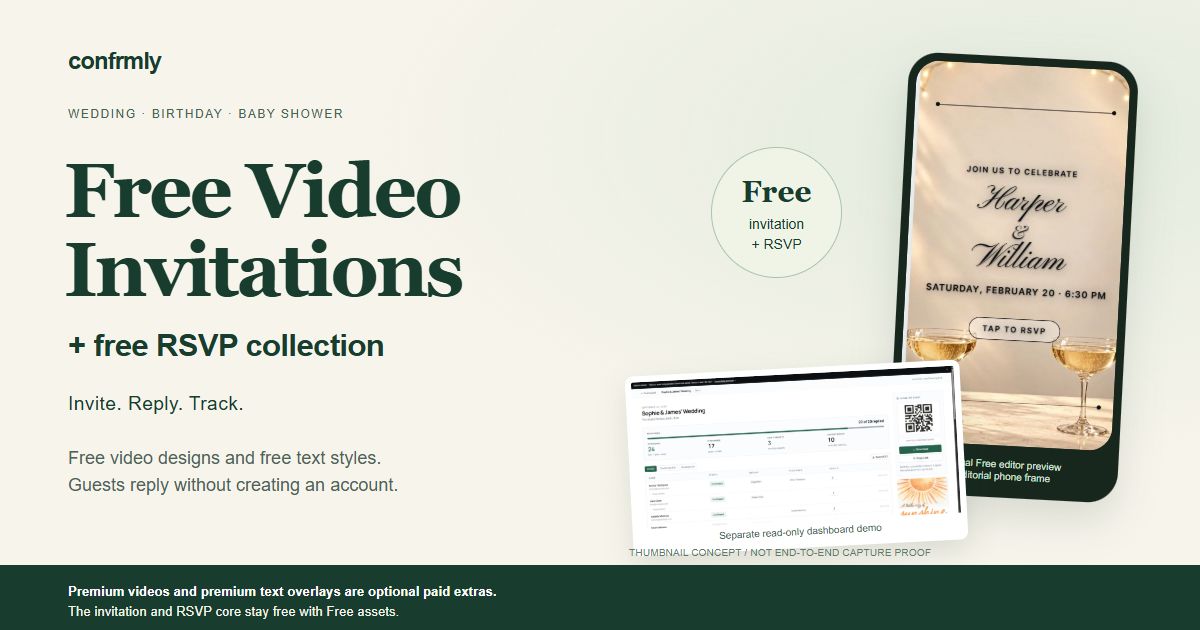
You can create a video invitation and collect RSVPs for free in Confrmly. Choose a video marked Free and a text style marked Free, add your event details, and share the invitation link. Guests open it in their browser and reply without creating an account. The host dashboard keeps their responses together.
The cost boundary is simple: Premium videos and Premium text overlays are optional paid design extras. Free invitation creation and RSVP collection do not require those extras. A Free video with a Free text style gives you the core invitation and response workflow.
This guide covers the full path, from choosing a design to reading your guest count. You can browse the video invitation catalog alongside it. The screenshots show the actual editor and public demos, not invented interface mockups. Demo replies are not saved, and the dashboard shown later is a separate example.
Key Takeaways
- Use a Free video and a Free text style to create a free invitation with free RSVP collection.
- Premium videos and Premium text overlays are optional paid extras, not requirements for receiving replies.
- The host registers with an email address and password. Guests need no account, but the reply form asks for their name, email, and attendance.
- Share the invitation page link so guests can see the invitation and find the RSVP action together.
- Confirmed replies and attending people are different counts when guests bring plus ones.
In this guide
- What is a video invitation with RSVP?
- What is free, and what is Premium?
- Create your free video invitation
- Share the invitation link
- How guests reply without an account
- Read your replies and guest count
- Wedding, birthday, and baby shower wording
- When optional Premium styling makes sense
- Check these details before sending
- Practical questions
- Your next step
What is a video invitation with RSVP?
A video invitation with RSVP combines an animated invitation with a browser page where guests can respond. The video creates the visual presentation. The RSVP form collects the answer. The dashboard gives the host a place to review it.
That distinction matters when you decide what to send. A standalone video file can show names, a date, and a venue, but the file itself is not an interactive response form. An RSVP button on an invitation webpage works because the guest is using that page, not because a button has been baked into an MP4.
For this workflow, think in three parts:
- The invitation: the video design, text style, and event information guests see.
- The guest reply: a form for attendance and any optional details enabled for the event.
- The host view: the dashboard where replies and attendance counts appear.
You don't need a complete wedding website to use this approach. It also suits a birthday party or baby shower where the main task is to share the details and ask who is coming. If you already have a printed or static invitation, you can keep that design and add an RSVP link or QR code instead.
What is free, and what is Premium?
Free covers the invitation and RSVP core when you choose Free design assets. Premium applies to optional videos and text overlays, so check both selections rather than looking only at the video.
| Feature or choice | Free or paid? | What to check |
|---|---|---|
| Video marked Free | Free | Choose a Free label in the video catalog. |
| Text style marked Free | Free | Check the text style as well as the video. |
| Core invitation creation with Free assets | Free | Keep both design selections Free. |
| Guest RSVP collection and host dashboard | Free | No Premium design is required for the core response workflow. |
| Video marked Premium | Optional paid extra | Review the Premium selection before proceeding. |
| Text overlay marked Premium | Optional paid extra | A Free video does not make a Premium overlay free. |
These categories are visible in the current invitation catalog. A basic Free text style is not automatically a paid overlay. You can use the free core without choosing either Premium option.
Keep the whole design free: check the video label, then check the text-style label. Both should say Free.
Create your free video invitation
Start with the event facts, then choose the design around them. A video invitation still needs to make the date, place, and reply request easy to read.
Register as the host
The host account uses an email address and a password you choose. This account is for creating and managing your event. It is separate from the guest experience, which does not require an account. Registration may show Check your email; if it does, follow the confirmation instructions to activate your account before continuing.
Have the following ready before entering your event details:
- The event name or the names you want on the invitation.
- The date and start time.
- The venue name and address.
- A reply-by date you can include in your invitation wording.
- Any short practical note guests need, such as a dress code or arrival instruction.
Keep the text concise. Put essential details first, and avoid using the video as a place for a long paragraph that guests must read while it moves.
Open the invitation editor
After registration, open the Your events dashboard and choose Create invitation. This opens the invitation-first editor. Registration creates your host account; it does not automatically create or publish an event.
Choose a Free video and Free text style
Pick the occasion and inspect the Free/Premium labels in the editor. For the wedding preview below, the actual selected combination is the Free Champagne Toast video with the Free Script Ribbon text style. The names and event details are fictional preview content.
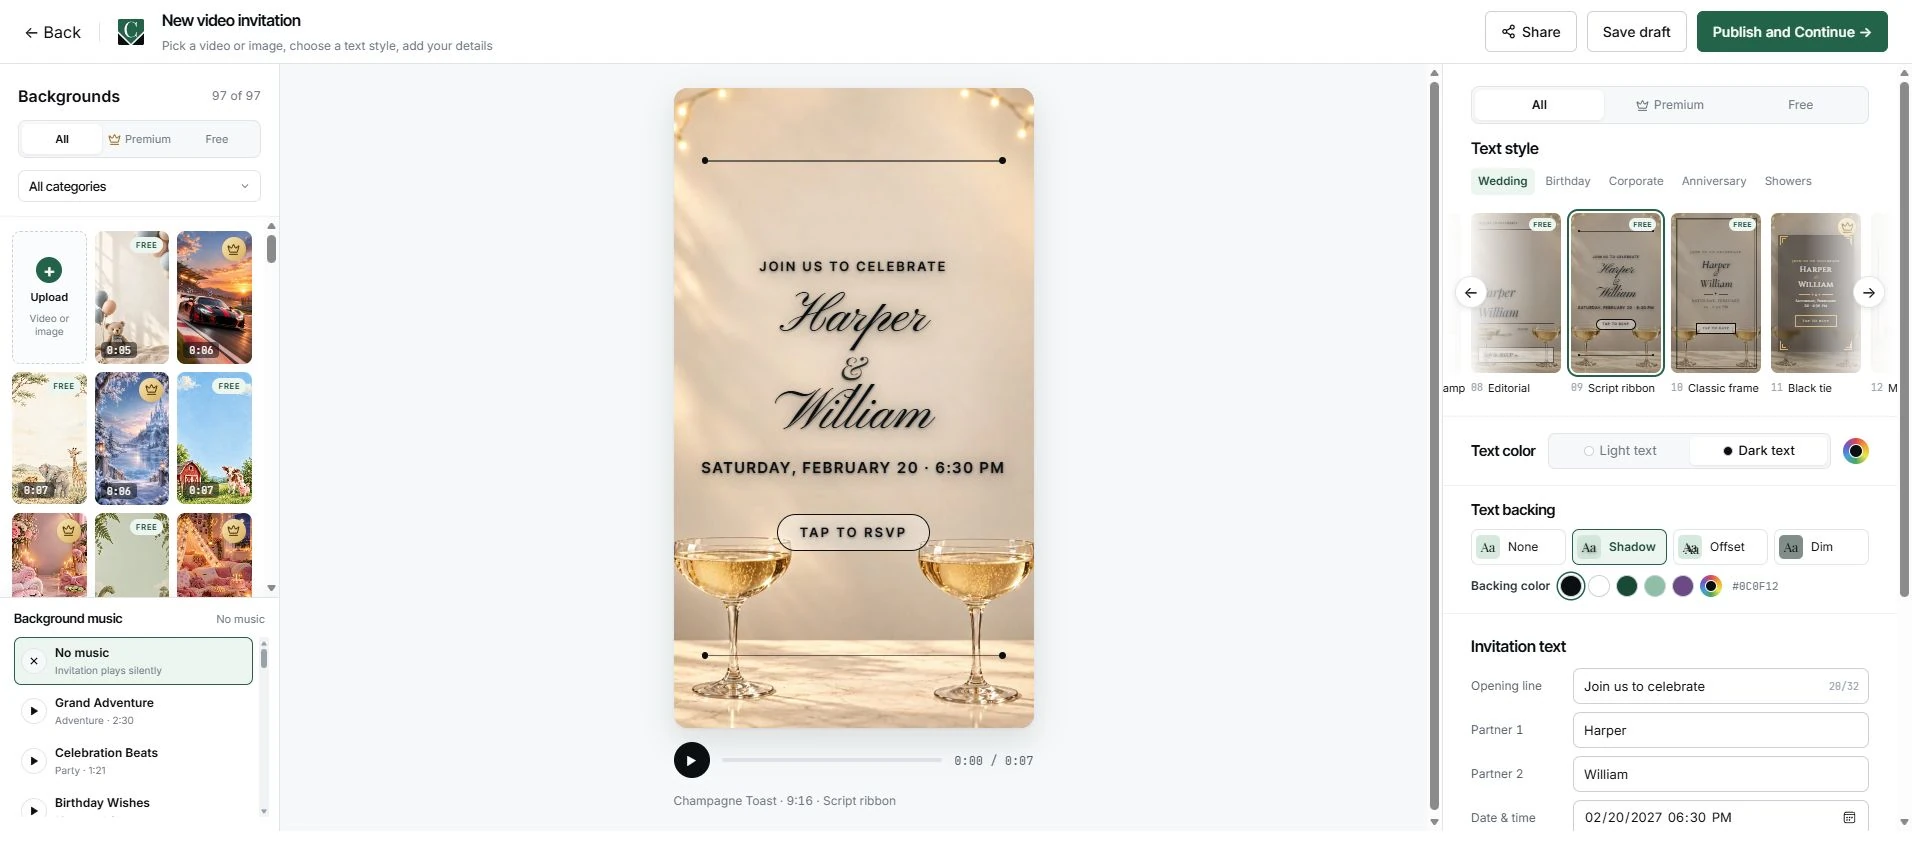
Select the video first, then review the text style. Treat them as separate design choices. If you want to stay entirely with Free assets, don't assume the first text option shown is Free just because the video is.
Use contrast to help guests read the words over the moving background. A decorative script can work for names, but the date and location should remain legible. If a line becomes crowded, shorten the wording rather than squeezing everything into one frame.
Add the details and inspect the mobile preview
Check the invitation at a narrow screen width before sharing. Long names, venue addresses, and reply instructions can wrap differently from the desktop editor.
A useful preview check: can you read the names, date, and place without pausing to guess? If not, simplify the text or choose a clearer Free style.
Look beyond appearance. Verify that the event date is correct, the venue information is complete, and the RSVP wording tells guests what you need. A reply-by line is an instruction for guests; don't assume it automatically closes the form unless your event settings explicitly say so.
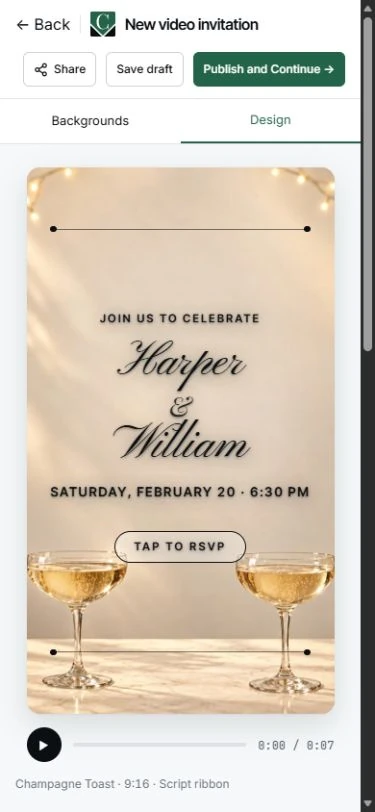
Save a draft, then publish before sharing
Save draft saves the design without activating the guest invitation link. Use it when you still want to adjust the details. Saving a draft and publishing an invitation are separate actions.
When the details are ready, check that both the video and text style are Free, then choose Publish and Continue. After publication succeeds, the current editor redirects to the event dashboard. If a Premium selection brings up checkout, switch both design choices back to Free if you don't want paid extras.
For a published invitation, choose Edit invitation from the event dashboard to reopen the editor, then choose Share. In Share invitation, use Invitation link and Copy link. On a supported phone, Share may open the native share sheet instead. The invitation link is available for sharing only after publication and opens the browser invitation page, not the editor or host dashboard.
Use the editor's invitation link for this guide. The dashboard's Copy RSVP Link provides a different address; don't treat the two links as interchangeable.
These steps describe the current interface and its verified source behavior. The screenshots in this guide remain previews and public demos; they do not show our example invitation being saved or published, or a guest reply being stored in that same event.
Before sending, use the completed invitation's guest link, not the editor address or your host dashboard address. Open that guest link separately and check the invitation details and route to the RSVP form.
Share the invitation link, not just a video preview
The invitation link gives guests the clearest route from viewing the design to replying. Send it with a short message that names the event and asks them to RSVP on the page.
For example:
You're invited to Maya's birthday party! Open the invitation for the date and location, then send your RSVP on the page by November 1. [Your invitation link]
Replace the bracketed text with your actual guest invitation link. The sentence is sample wording, not a working invitation. You can send the link through your usual messaging or email channel; keep the event name in the message so guests know what they are opening.
Avoid sending only a screenshot of the invitation if you expect guests to reply online. A picture can show the design, but it doesn't provide the same direct route to the response form. If you share a preview as well, include the invitation link in the accompanying message.
For a printed card, a QR code can point to the response page. The guide to adding an RSVP QR code to a Canva invitation covers that separate printed-invitation approach.
How guests reply without an account
Guests open the invitation page, find the RSVP action, and complete the reply form. They don't register or choose a password. “No guest account” does not mean “no guest information”: the form still needs to identify the reply.
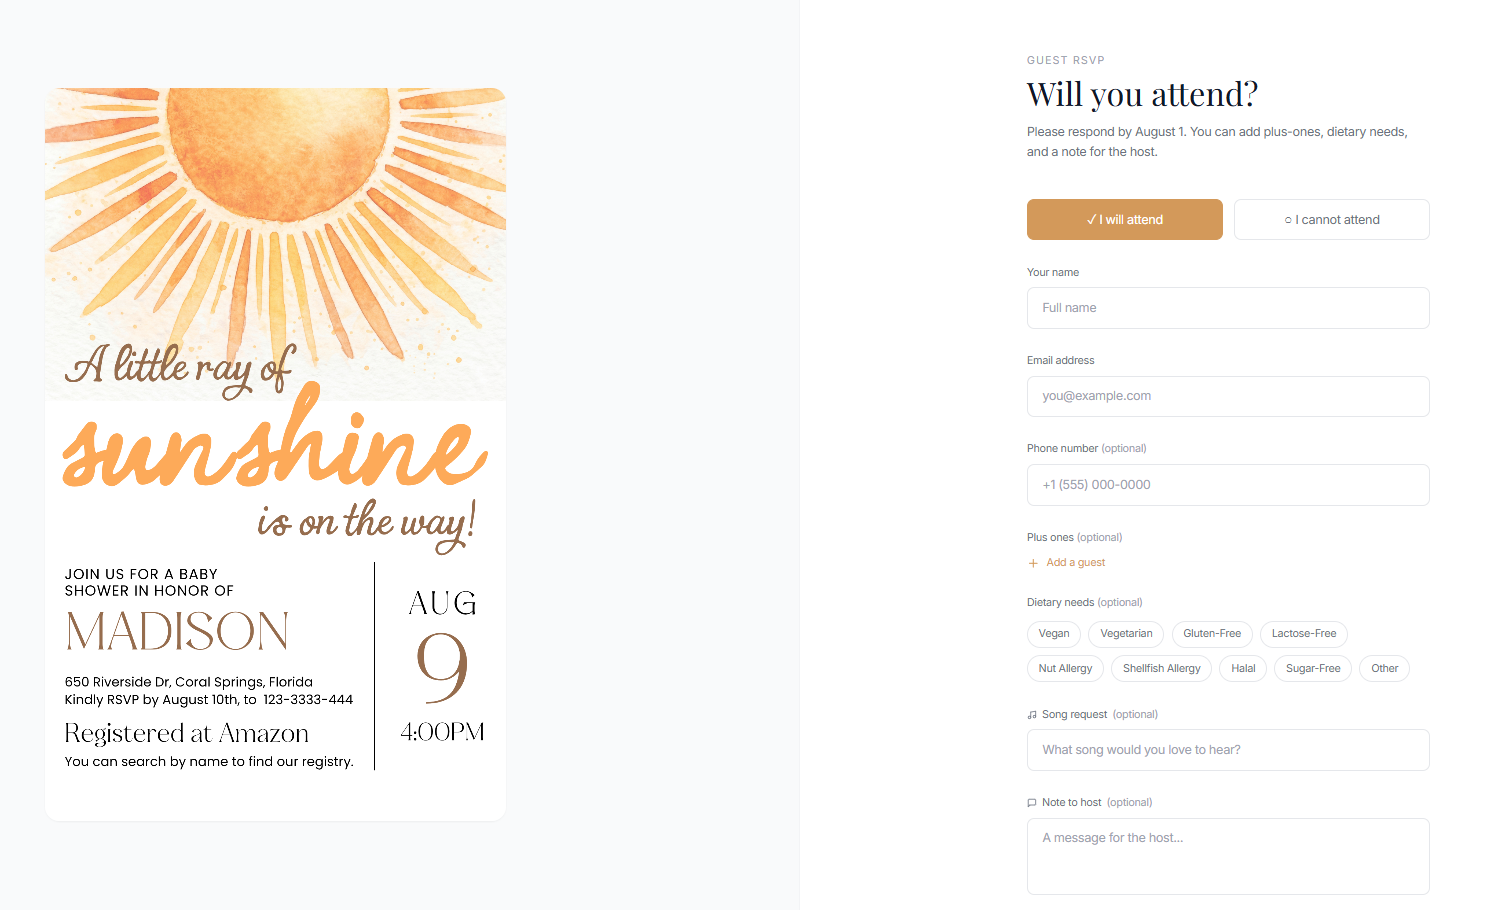
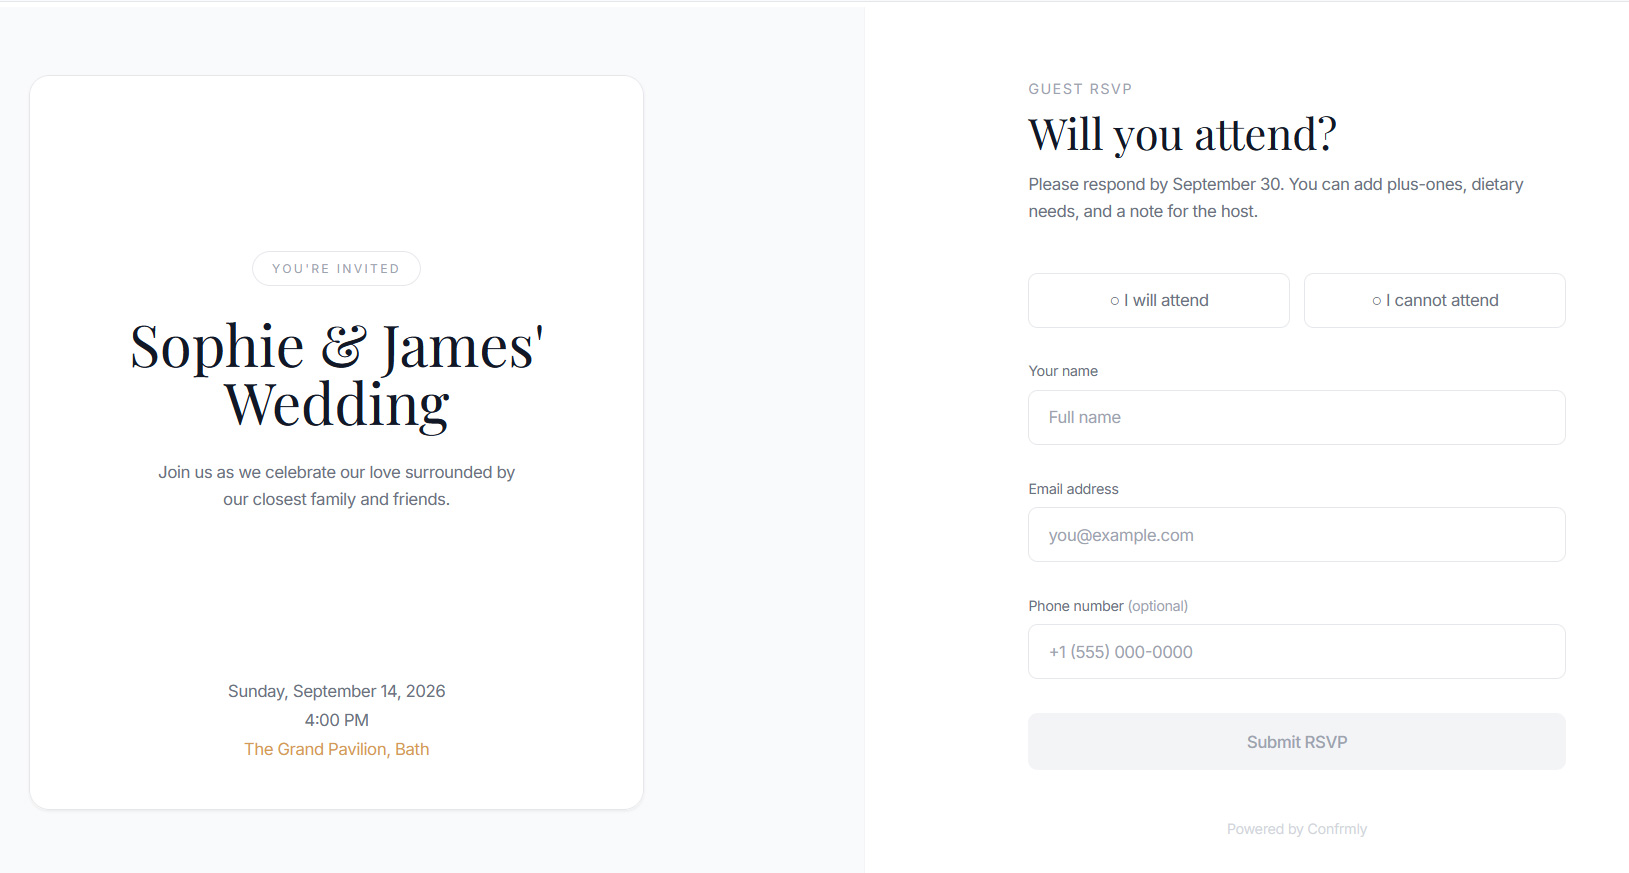
The public guest demo shows the required name, email, and attendance fields. Phone is optional. Other questions, such as plus ones, dietary information, a song request, or a note, depend on the fields enabled for the event and the attendance choice.
For a guest, the sequence is straightforward:
- Open the invitation link in a browser and read the event details.
- Choose whether you can attend.
- Enter your name and email address.
- Complete any relevant optional fields shown for that event.
- Send the reply and look for the confirmation screen.
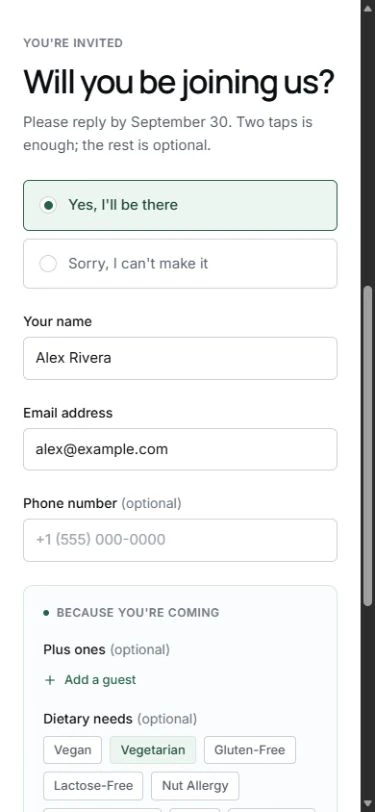
The public guest demo lets you explore that form without creating a real guest record. In the captured demonstration, sending the fictional reply displayed the confirmation below.
Demo limitation: the confirmation explicitly says no data was saved. It demonstrates the form transition, not a stored reply in a live event.
When you share your own invitation, send the actual guest event link, not this demo URL. Otherwise, guests would be trying a demonstration instead of replying to your event.
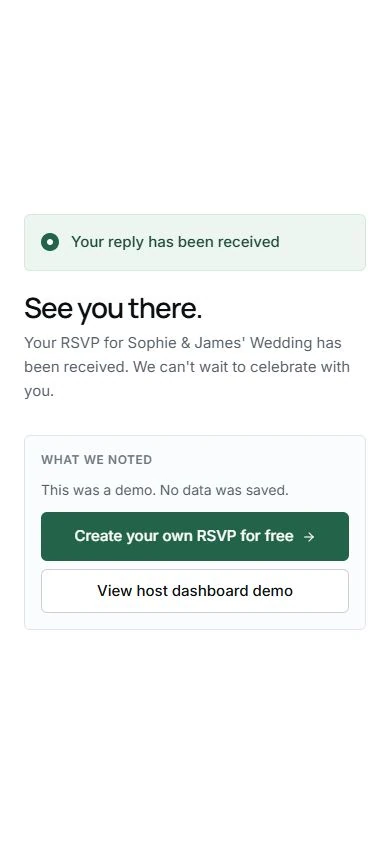
Read your replies and guest count in the dashboard
The host dashboard brings RSVP responses into one view, but a reply count and a headcount can mean different things. Read the labels before using a total for seating, food, or the venue.
The read-only dashboard demo shows attendance statuses, guest details, and summary counts. Its example data is separate from the guest form demonstration above.
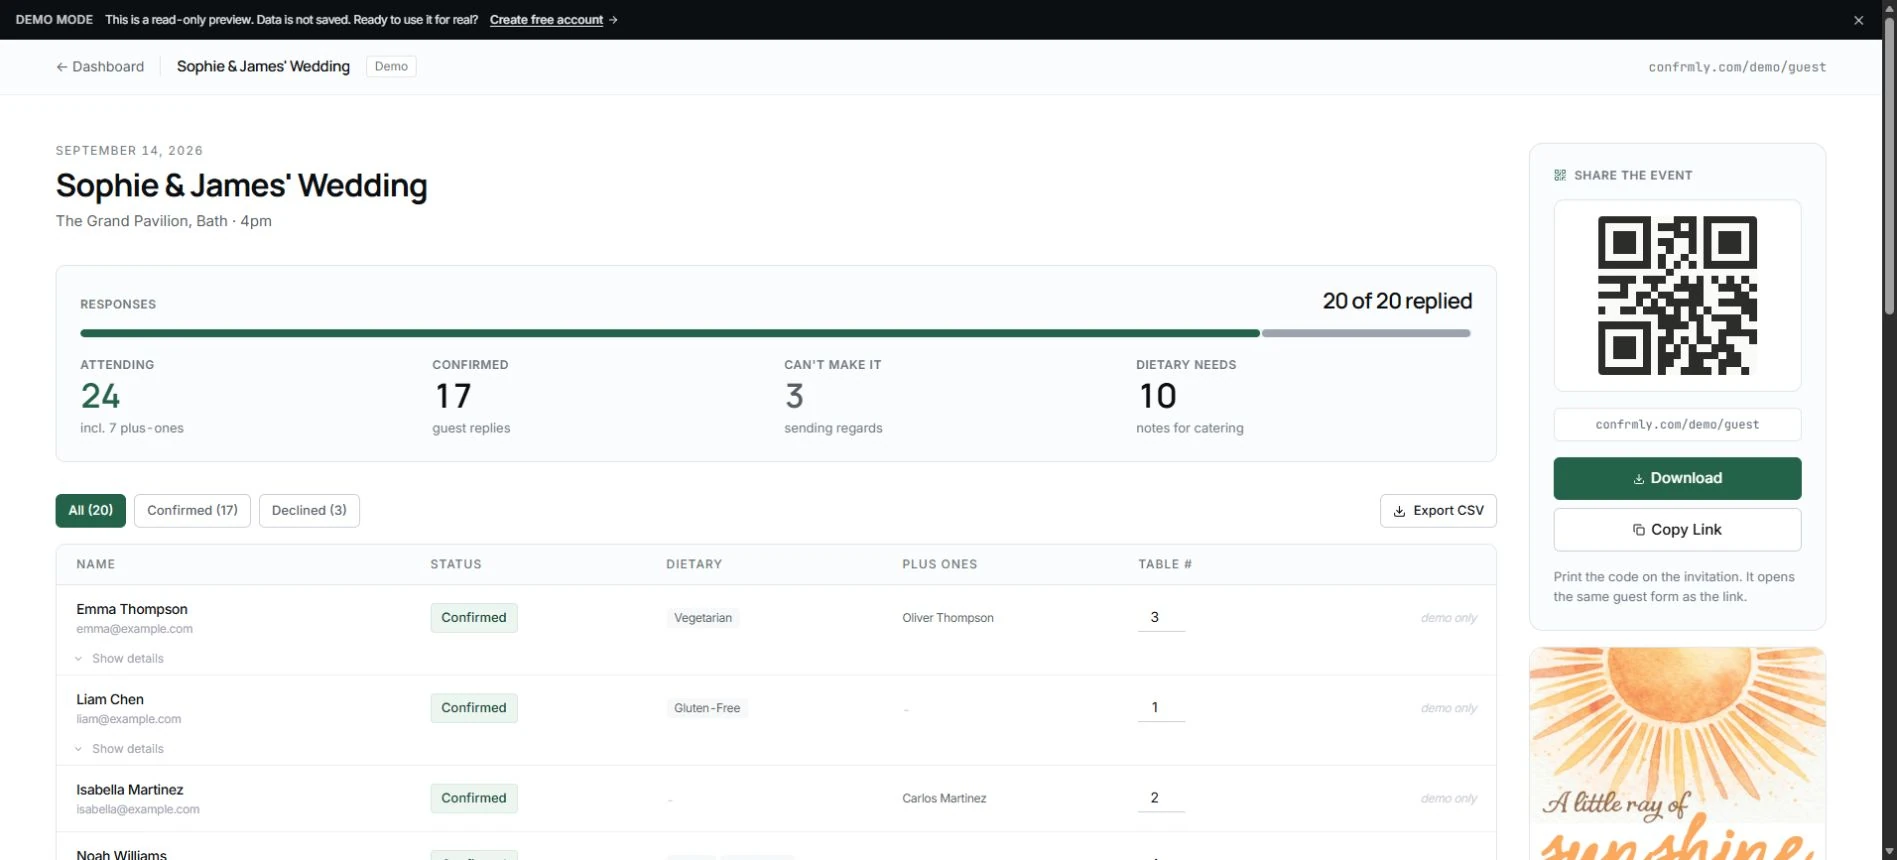
In this example, the dashboard displays:
- 20 replies: the total recorded example responses.
- 17 confirmed and 3 declined: the attendance choices among those responses.
- 24 attending people: the confirmed respondents plus 7 additional guests.
The arithmetic is 17 confirmed respondents plus 7 plus ones, giving 24 people expected to attend. It does not mean 24 separate confirmed replies. These are demonstration counts, not customer results or a claim about your event.
Use that distinction when planning. If plus ones are enabled, check the attending-person total rather than treating each confirmed row as one person. Review notes and dietary information separately so a useful detail doesn't get lost behind the summary numbers.
For a broader process that also works with printed and static invitations, see the guide to tracking RSVPs. If your deadline approaches with replies missing, use a short personal message; the guest follow-up guide offers wording. Neither step requires treating optional Premium design choices as an RSVP upgrade.
Wedding, birthday, and baby shower video invitation wording
Good wording gives guests the occasion, names, date, time, place, and a clear reply request. The tone can change, but those facts remain useful for every event.
These original examples use fictional names and venues. Adapt the wording to your own details; they are not screenshots of saved events.
Wedding video invitation
Harper & William
Together with their families, invite you to celebrate their wedding.
February 20, 2027, at 6:30 PM
Willow House, 123 Example Lane
Please RSVP on this invitation page by January 20.
For a wedding, check both names carefully and make the venue information readable. If you need longer travel or schedule information, don't crowd the moving invitation with it.
Birthday video invitation
Maya is turning 30!
Join us for a birthday celebration.
November 14, 2026, at 6:00 PM
The Garden Room, 456 Example Avenue
Please RSVP on this invitation page by November 1.
A birthday invitation can be playful without hiding the practical details. Include any short arrival or dress instruction that guests actually need.
Baby shower video invitation
A little one is on the way.
Join us for a baby shower honoring Jordan.
December 5, 2026, at 2:00 PM
Cedar Room, 789 Example Street
Please RSVP on this invitation page by November 21.
Make it clear who the celebration honors. If a registry note is appropriate, treat it as optional invitation wording, not as a claim that the form includes a dedicated registry feature.
When optional Premium styling makes sense
Premium videos and Premium text overlays are for a different visual finish, not for unlocking the basic RSVP task. You can choose them if the design suits your event and you want that optional paid style.
The important choice is whether you prefer the look enough to pay for it. Keep checking the labels: a Premium video and a Premium overlay are distinct selections. Review the current price and checkout information shown before purchasing, rather than assuming an amount from an older guide.
If a Free combination already looks right, keep it. You can still create the invitation, share the guest link, and use free RSVP collection and the host dashboard. “Premium feel” is a design preference here, not a requirement for gathering responses.
Check these details before sending
The most useful final check is to open the exact guest link you plan to send. Confirm that it points to your event and that the essential details and RSVP route are easy to find.
| What you notice | What to check next |
|---|---|
| A paid design option appears unexpectedly | Inspect both the video and text-style labels. Keep both Free if you want a fully Free design combination. |
| Names or venue text is hard to read | Shorten crowded lines, check contrast, and inspect the narrow-screen preview. |
| Guests open a demo or editor instead of the event | Replace that address with the completed invitation's guest link. |
| The form does not advance | Check the required name, email, and attendance fields for missing entries or visible validation messages. |
| Your headcount seems larger than confirmed replies | Look for plus ones and compare the attending-person count with the confirmed-response count. |
If you use a QR code, also check the printed size, contrast, and destination. The RSVP QR-code troubleshooting guide explains that separate issue. For an account or invitation problem you can't resolve from the visible message, use the contact page.
Practical questions
Are free video invitations a free trial?
The core workflow described here is free with Free assets, not an instruction to start a paid trial. Only optional Premium videos and Premium text overlays are paid design extras. Check the current labels when choosing your combination.
Do guests have to sign up to RSVP?
No. Guests reply without an account. The form still asks for their name, email, and attendance so the response can be identified. Optional fields depend on the event configuration.
Is every video and text overlay free?
No. The catalog includes Free and Premium choices. Choose a Free video and a Free text style if you want to keep the design free; a Premium label identifies an optional paid choice.
Does RSVP work inside a video file?
The RSVP action belongs to the browser invitation page, not to a clickable control inside a standalone MP4. Share the invitation page link so guests can reach the response form.
Can I try the guest process before sharing?
Yes. The public guest demo shows the reply form and demonstration confirmation. It does not save a reply. Before sending your own invitation, separately check your actual event's guest link; the demo cannot verify that link for you.
Your next step
Start with a Free video and a Free text style, then focus on clear details and the correct guest link. That combination keeps the invitation and RSVP core free. Optional Premium styling can wait until you decide whether you want a different visual finish.
When you're ready to create your invitation, register as a host with your email address and a password you choose. Review the preview, check the guest route, and share the completed invitation link.
Editorial ownership: Confrmly publishes this guide about its own product. The guide is based on the current invitation editor and public demos reviewed on October 11, 2026. The screenshots use fictional preview details or demonstration data; no live guest responses or physical-phone testing are presented. Product corrections can be directed through the contact page linked above, and publisher details are on the About page.
Ready to send invites?
Create your event on Confrmly
Set up your RSVP page, share the link with guests, and keep their responses in one place.
Get Started Free