
Free Birthday Video Invitations with RSVP: A Practical Guide
Create a free birthday video invitation, share its link, and collect RSVPs. See a party preview, the guest reply form, and host dashboard.
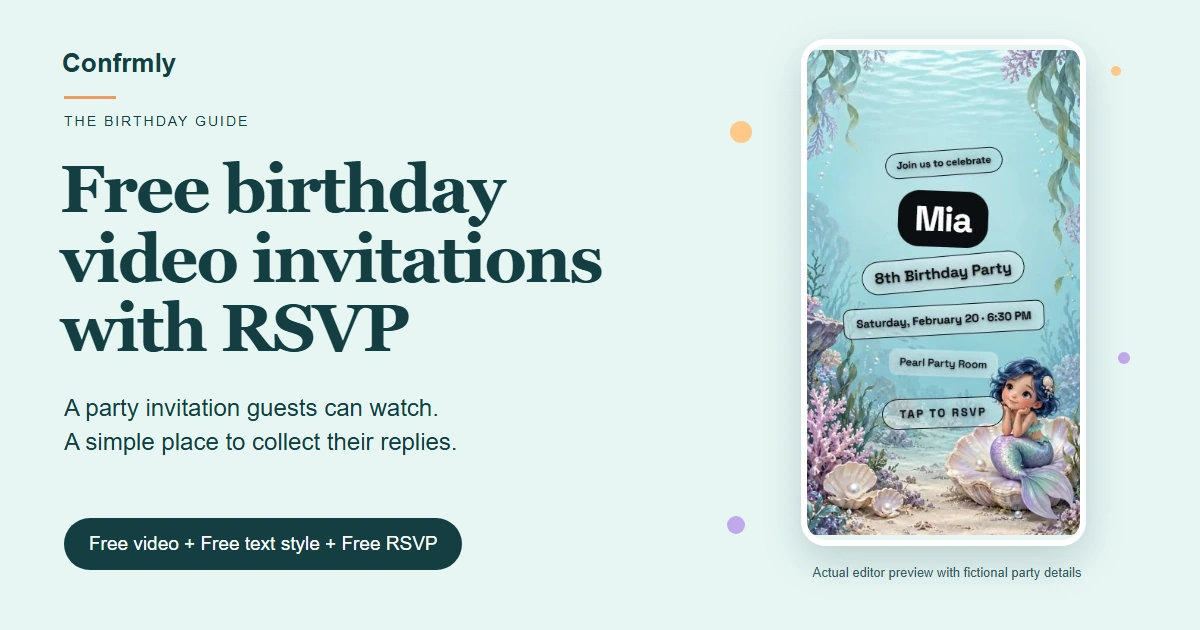
You can create a birthday video invitation and collect online RSVPs for free by choosing a Free video and a Free text style. Optional Premium videos and Premium text overlays are paid design extras, not requirements for the basic invitation, guest reply, or host dashboard workflow.
For a birthday party, the practical details matter as much as the animation. Guests need to know who is invited, when to arrive, where to go, and how to reply. A children's party may also need clear instructions about parents and siblings. This guide covers those decisions, the editor workflow, and real public demo screens. For the all-occasion setup, see the free video invitation guide.
Key Takeaways
- Choose both a Free video and a Free text style to keep the design combination free.
- Name the invited people and explain parents, siblings, or permitted additional guests in your message.
- Share the invitation page link, not only a video clip or screenshot.
- The host registers with an email and a chosen password. Guests reply without accounts.
- Count attending people for party planning; a response total alone may not be your headcount.
In this guide
- Prepare your birthday party details
- Choose a Free birthday design
- Check the preview and wording
- Publish and share the invitation link
- Understand the guest reply
- Turn replies into a party headcount
- Use original birthday wording examples
- Check everything before sending
Step 1: Prepare the party details
Decide what guests need to know before selecting a design. Canva's birthday invitation guide identifies the honoree, occasion, date and time, location, and RSVP information as useful invitation details. For your party, make the guest boundaries just as clear.
Have these details ready:
- The birthday person's name and, if you want to include it, age.
- The party date and start time.
- The venue name and complete address.
- An end or pickup time when guests need one.
- The people covered by each invitation.
- A reply-by date and a short instruction to use the invitation's RSVP form.
The editor offers an optional Age entry, birthday-line choices, date/time, place name and address, and a reply deadline. Check the resulting preview rather than assuming every entered detail appears in every style. Put extra instructions in the accompanying message if they do not fit the visible invitation.
For a children's birthday
State whether a parent should stay, whether the party is drop-off, and whether siblings are included. Paperless Post's kids' birthday invitation guidance also highlights parents and siblings as details worth explaining.
These are wording decisions, not claims that the RSVP form has separate child, parent, or pickup fields. A message such as “Jamie is invited with one parent; please stay for the party” explains the intended party more clearly than a general “join us.” Choose arrangements that fit your own event and communicate directly if anything is unclear.
For an adult birthday
Distinguish arrival time from a seated dinner or other fixed start. Name an invited pair, or say whether one additional guest is welcome. An address and a reply date remain useful even for a casual gathering; do not leave them only in a private group chat where a guest may miss them.
Step 2: Choose a Free video and a Free text style
Select the video and text style independently. A Free video does not make a Premium text overlay free, and a Free text style does not change the cost category of a Premium video.
- Open the invitation catalog and browse Birthday designs.
- Register as the host with an email and a password you choose. Follow any email-confirmation instructions shown.
- From Your events, choose Create invitation to open the editor.
- Select a video labeled Free, then a text style labeled Free.
- Enter the party details and review the preview before saving.
The birthday example uses the Mermaid Pearl Lagoon video with the Sticker tags text style, a Free combination. The sample details are fictional, and the editor preview is not a published party.
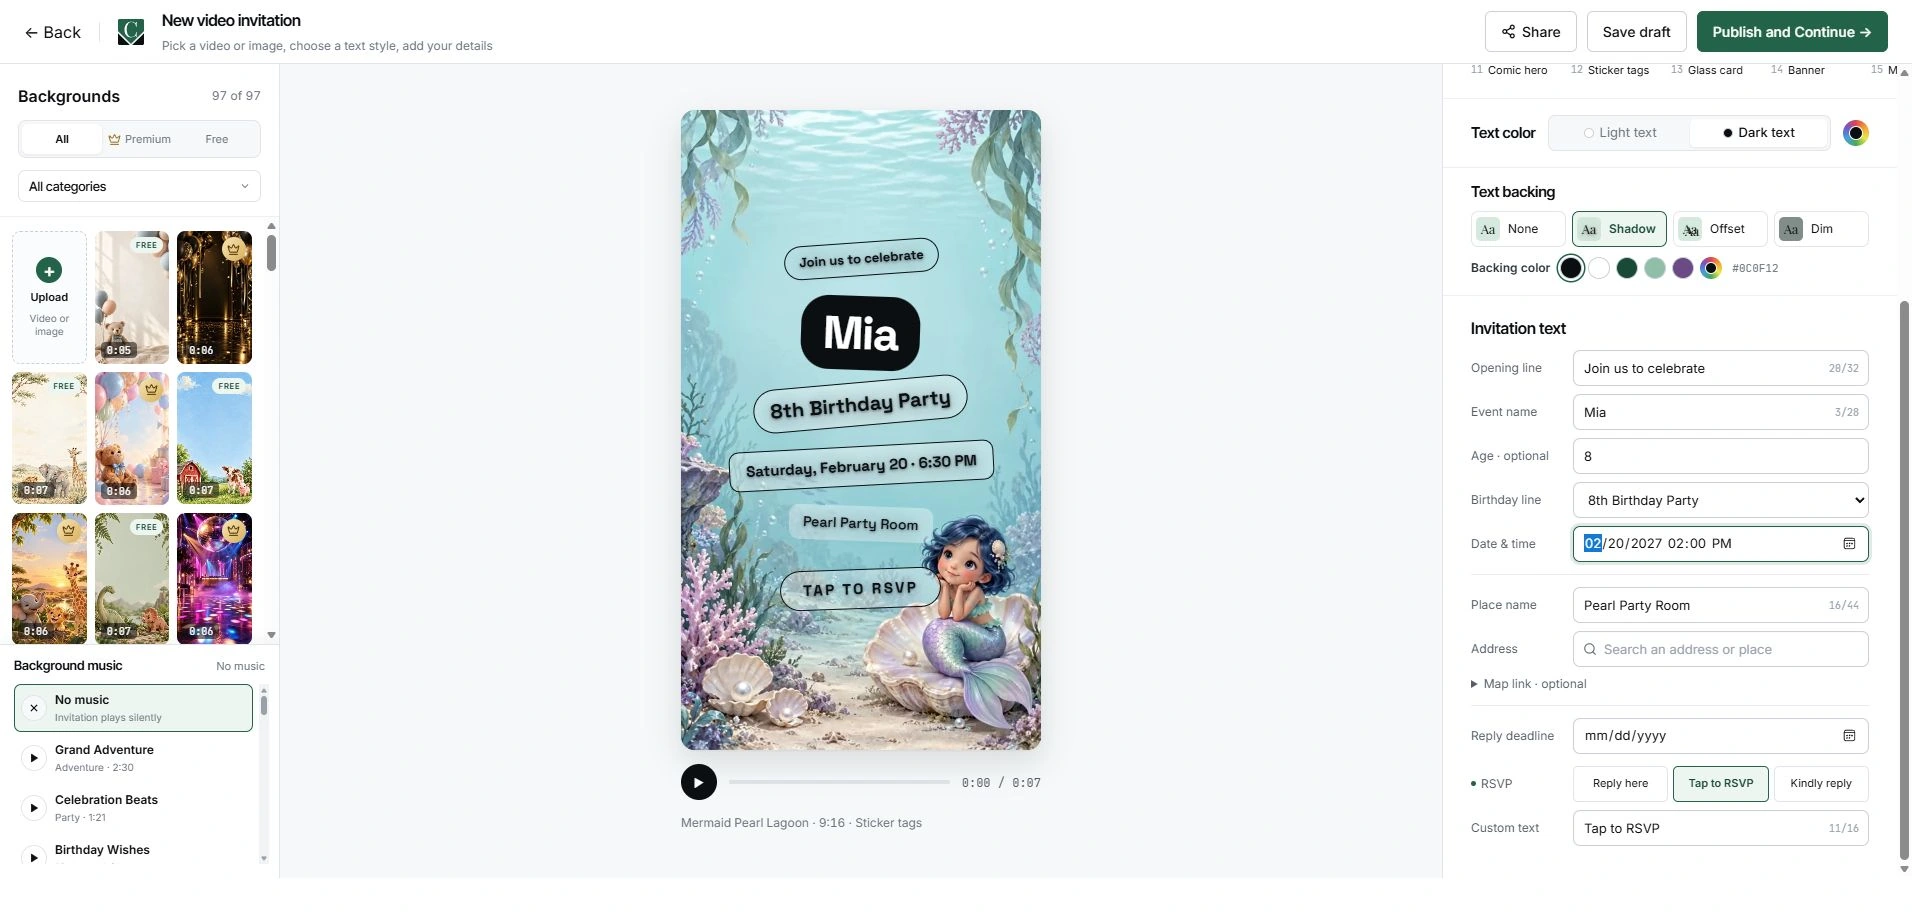
What is free, and what is optional?
| Choice or function | Cost category |
|---|---|
| Video labeled Free | Free design choice |
| Text style labeled Free | Free design choice |
| Invitation creation with Free assets, guest RSVP collection, and host dashboard | Free core workflow |
| Video labeled Premium | Optional paid design extra |
| Text overlay labeled Premium | Optional paid design extra |
Premium videos and Premium overlays offer alternative styling if you want a different finish. Check the current price before purchasing. You can keep the invitation and RSVP process fully free by staying with Free assets, including a Free text style.
Step 3: Check the birthday preview and wording
Make the party facts readable at a narrow screen width. Decorative text should not hide the name, time, location, or response instruction.
The actual portrait editor preview shows Mia's fictional 8th birthday party, Saturday, February 20, at 6:30 PM, at Pearl Party Room. It uses the Free Mermaid Pearl Lagoon video and Free Sticker tags style. Check the longest name and venue lines for crowding, and watch whether the words remain clear against different moments in the animation.
Keep the main invitation short. An opening line, name, birthday detail, date/time, and venue are usually more useful than a long paragraph on the video. Put parents-stay instructions, pickup timing, or directions in ordinary text in the accompanying message where guests can find them.
W3C's contrast guidance explains why text needs enough contrast against its background. It supports checking readability, but this preview is not a measured accessibility-conformance audit.
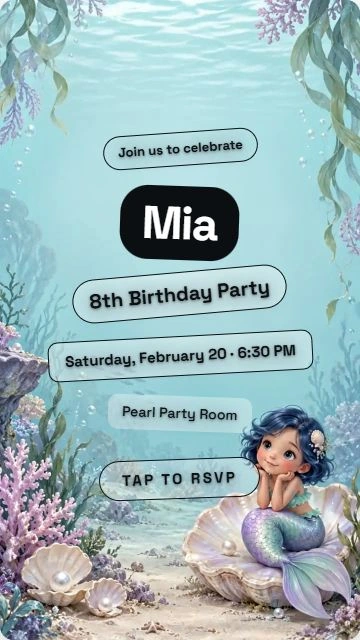
Keep essential information available as ordinary text too. W3C's text-resize guidance explains the importance of enlarging text without losing content. A plain-text party summary helps guests who cannot comfortably read words inside a visual design.
Verify the reply deadline where guests will actually see it. Entering a deadline does not prove the chosen style displays it. A written reply-by date also does not, by itself, prove that the form closes automatically. Include the instruction in the accompanying message and check outstanding replies yourself when the date arrives.
Step 4: Publish and share the invitation link
Finish the design before distributing the guest link. Save draft keeps the invitation available for editing; it does not activate the guest invitation link.
- Confirm the date, time, place, and both Free design selections.
- Choose Publish and Continue when ready. Successful publication returns to the event dashboard; complete any setup instructions shown.
- Open the published design through Edit invitation, then choose Share.
- In Share invitation, use Invitation link and Copy link. A supported device may offer a native share sheet.
- Open that exact guest link separately and check the birthday details and RSVP route before sending it.
The editor's invitation-sharing link and the dashboard's Copy RSVP Link are different addresses. Use the invitation link when you want guests to see the video invitation. Never send the host editor or dashboard address as the guest invitation.
The RSVP action belongs to the browser invitation page, not to an interactive button inside a downloaded MP4. If you share a picture or video preview in a message, include the actual invitation link so guests can respond. This guide describes the current workflow; its fictional preview was not saved or published to test a persistent event.
Step 5: Understand how guests RSVP
Guests can reply without creating an account or choosing a password. The form still needs identifying information so the host can tell whose answer it is.
The public guest demo shows name, email, and attendance fields. Phone is optional. Additional questions depend on the event settings and attendance choice, so inspect your own event's form before explaining what guests will be asked.
- Open the invitation page and read the party details.
- Find the RSVP action and select whether you can attend.
- Enter the required name and email information.
- Complete any relevant questions that appear.
- Submit and look for confirmation.
For a child's party, make clear in your message how the family should identify its reply. Do not assume the form automatically separates a child from an accompanying parent.
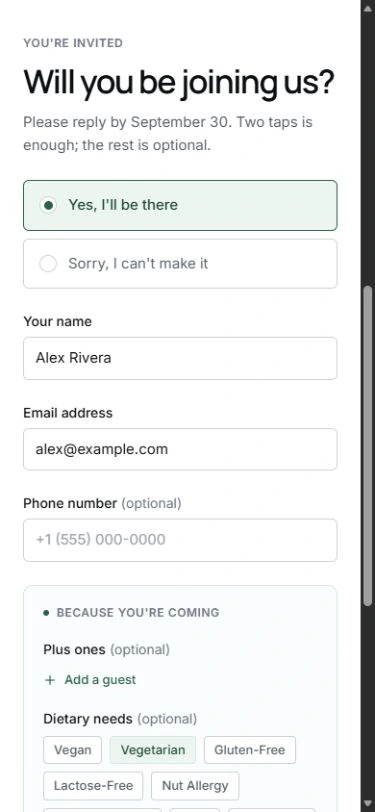
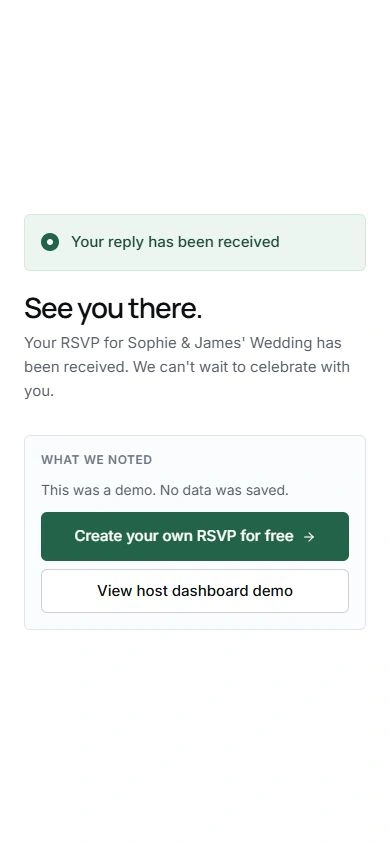
Look for confirmation after submitting. The captured demo confirmation explicitly says no data was saved. It shows the response transition, not an RSVP stored for the fictional birthday party.
You can inspect the public guest demo without creating a real guest record. For your party, share your published event's actual invitation address instead of the demo link.
Step 6: Turn replies into a party headcount
Count people, not just response rows, when planning seats and refreshments. One confirmed respondent may include permitted additional guests, while someone who has not replied is not automatically a decline.
The read-only dashboard demo shows separate seeded example data. It is not connected to this birthday preview or the public guest reply shown above.
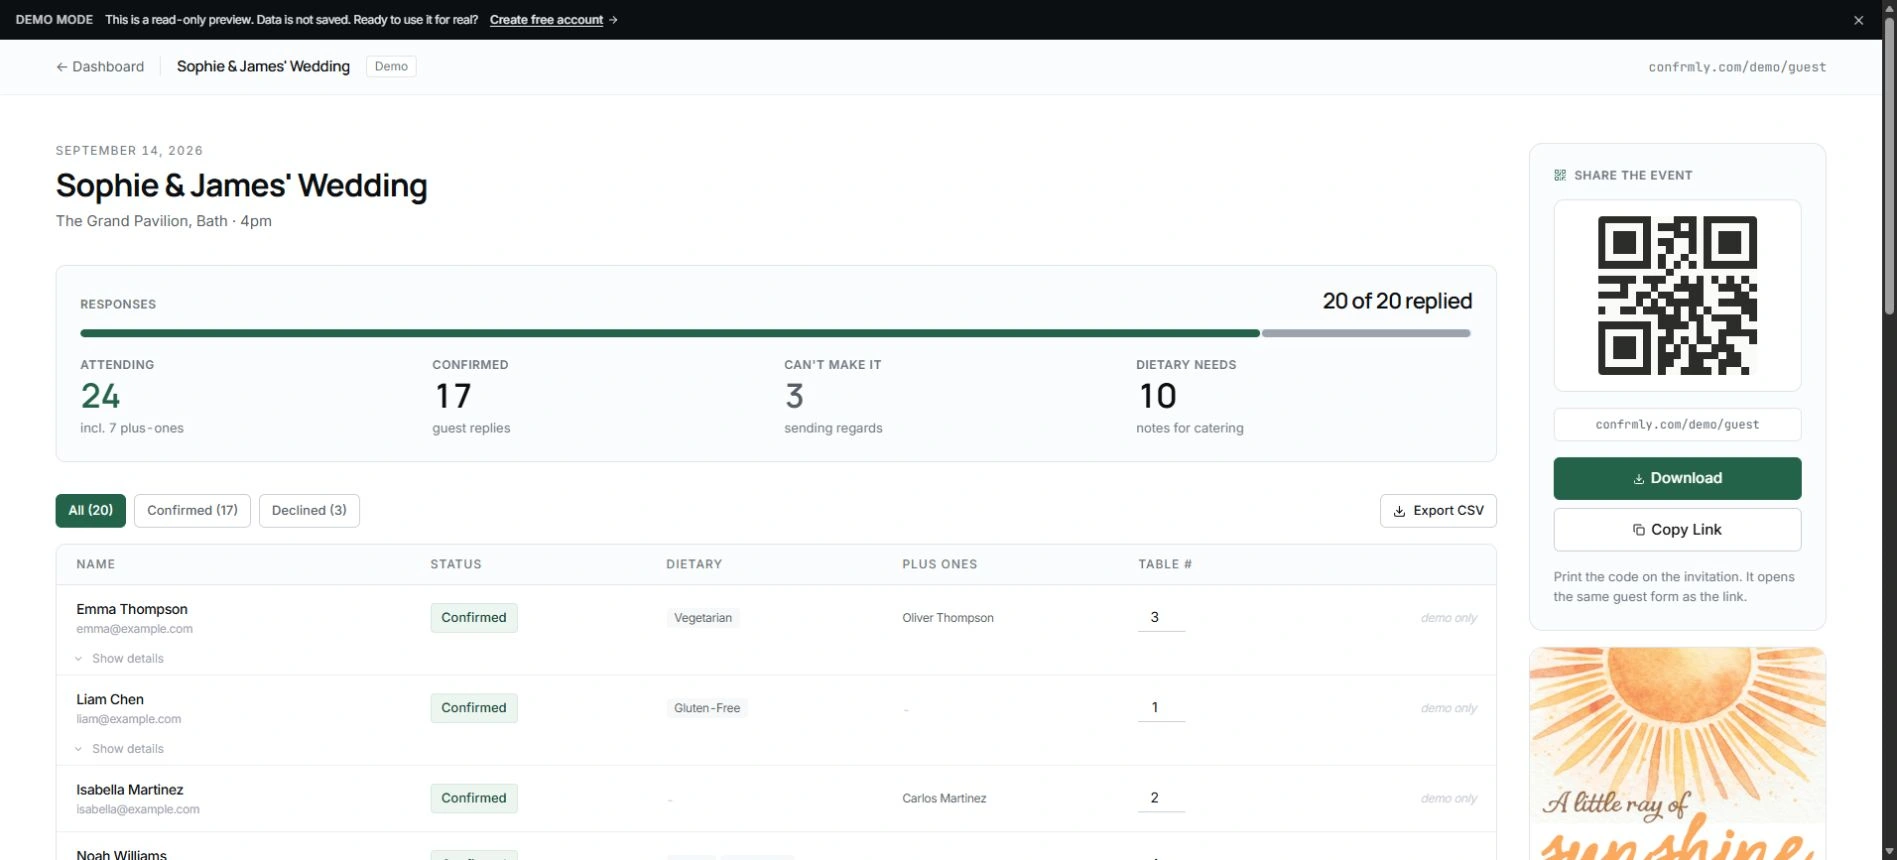
The demo has 20 replies: 17 confirmed and 3 declined. Its 17 confirmed respondents and 7 additional guests represent 24 attending people. These are fixture numbers, not customer results or 24 separate confirmed responses.
For your birthday party, reconcile the attending people with the intended invitations. If a child and one parent are coming, that can mean two people to plan for, even if one person submits the reply. If an adult guest may bring someone, check whether that additional attendee is actually included. Keep any planning breakdown you need rather than assuming every response row contains separate child and adult totals.
The RSVP tracking guide covers the broader organization process. If answers are missing near your deadline, use a personal reminder; the guest follow-up guide provides wording you can adapt.
Two original birthday invitation wording examples
Use the video for the main party facts and the accompanying message for guest-specific instructions. All people, venues, and dates below are fictional. Replace every detail and bracketed placeholder before sharing.
A children's birthday with a parent staying
Celebrate Mia's 7th birthday
Saturday, March 6, 2027, at 2:00 PM
Bluebell Party Room
An afternoon of games and birthday cake
Accompanying message:
Jamie is invited with one parent to Mia's party at Bluebell Party Room, 123 Example Lane, from 2:00 to 4:00 PM. Please stay with Jamie during the party. This invitation covers Jamie and one parent, not siblings. Open [your invitation link] and reply by February 20, letting us know whether both of you will attend.
This version gives an end time and explains the invited party. For a drop-off event, replace the parents-stay sentence with your agreed arrival and pickup instructions. Those details belong in your communication, not in an assumed pickup tool.
An adult birthday dinner with a named pair
Join us for Alex's 30th birthday
Saturday, April 10, 2027
Arrive at 6:30 PM; dinner at 7:00 PM
Maple Table
Accompanying message:
Taylor and Sam, you're invited to Alex's birthday dinner at Maple Table, 456 Example Avenue. Please arrive at 6:30 PM for dinner at 7:00 PM. Open [your invitation link] and RSVP by March 25, including whether both of you can come.
Naming the pair avoids an open-ended “bring someone” instruction. If an unnamed additional guest is welcome instead, say that clearly and verify how your event's form collects the relevant information.
Check everything before sending
Open your copied guest link and check the party details and reply route together. A good-looking editor preview does not prove that you copied the correct published address.
- Both the video and text style say Free if you want no paid design extras.
- Name, optional age, date, time, venue, and address are correct.
- The message explains invited people, parents, siblings, or permitted additional guests.
- Any end or pickup time is clear where needed.
- The reply-by date is visible in the invitation or accompanying message.
- The address opens your invitation, not a demo or host page.
- The form matches the questions and guest arrangement you intend.
Start with a Free combination in the invitation catalog, then keep the party facts clear. Share the actual invitation link, look for replies, and review the attending-person total for planning. Optional Premium videos and Premium text overlays remain a styling choice, not a requirement for free RSVP collection.
Editorial ownership: Confrmly publishes this guide about its own product. Workflow sources and public demos were reviewed on October 11, 2026. The birthday editor example uses fictional details; the guest form, confirmation, and dashboard are separate demonstrations. They do not prove a published sample birthday, a saved reply for that party, or physical-phone testing. Publisher information is available on the About page, and product corrections can be sent through the contact page.
Ready to send invites?
Create your event on Confrmly
Set up your RSVP page, share the link with guests, and keep their responses in one place.
Get Started Free